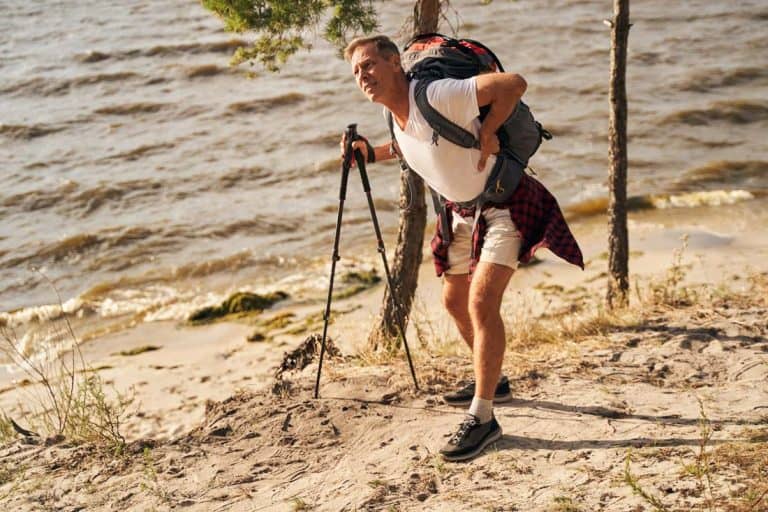
This detailed article will examine a kind of pain that is met after walking outdoors. That is the lower back pain after hiking.
The scope of this article is to provide as much information about the topic as possible, but it is not medical advice.
Back pain after hiking can be an annoying thing that fades away after simply resting a bit, or it can be a more severe case that needs special treatment. In some cases, it shows up due to wrong posture, wrong backpack placement, and even wrong footwear.
In other cases, the problem is already there and shows up after stressing the back area a lot.
What’s Lower Back Pain?

Let’s make it clear that back pain has no age. It can happen to anyone. If you have no noticeable precondition, the common cause of pain relates to how muscles, ligaments, and bones connect and work as a unit. The lower back area is located between the bottom of your rib cage and the upper of your legs. That contains five vertebrae and is also known as the lumbar area.
The lumbar area is not solely affected by hiking. All-day long, that region is stressed from simply carrying your upper body weight. When the conditions to produce pain are in place, you may feel that as sharp pain or gradually increasing pain.
If you just got that area under pressure, the pain may move away after resting. However, when you notice additional symptoms like swelling or getting numb, or even a fever, that is a sign to book an appointment with a doctor.
Something must be examined if you see that pain coming and going every time you hike. Acute pain is one thing and may fade away, but you don’t want to build a chronic pain case that creates more damage and discomfort.
What Causes Lower Back Pain After Hiking?
The reason back pain occurs varies. The cause may not be related to hiking, just triggered by it. But also, the cause of the pain may link directly to things done wrong during hiking. Let’s examine the common causes.
Backpack
An overloaded backpack can cause back pain—the same stands with a low-quality one. Packing things wrongly in a backpack can contribute to back pain after hiking or during hiking. Make sure you put the heavier items in the bottom of the backpack.
On top of the reasons mentioned above, not fitting your backpack right can put lots of stress on your shoulders and your lower back. Backpacks must sit on your waistline (resting on your hips) and not on your shoulders. Get one that has padded shoulder straps and a chest strap. All that stabilizes it from moving left and right, adding stress on your lower back on every step and rough terrain.
Make sure you get only the gear you need, and it is lightweight.
It would be best to buy a backpack with lumbar support that sits well on your lower back. That means to get one that is correct for your torso length. You must adjust it properly on your body.
Terrain
The terrain influences your posture and how you take each step. That -additionally- changes when you move uphill or downhill, while it is entirely different on flat terrains.
Even flat terrains can be strenuous to your back when paved with pebbles or rocks, making your steps uneven.
Proper walking in hiking comes with some basic rules, and your posture must adjust depending on the terrain.
When you move uphill, lean forward a bit, changing the body angle against the ground. Make sure that you stretch your leg on every step, so your hamstrings stretch. Don’t try to put your heel down first. That is physiologically not easy to do, and if you try, it will stress your legs and lower back a lot.
When you move downhill, you should put your heel down first (to avoid slipping) and keep your torso straight. Don’t lean forward, as that will break your balance and stress your lower back.
Injury
An existing lower back injury will cause pain after hiking, and that pain may reflect on other parts of your lower body. It would be best to be extra careful about the gear weight you plan to carry and the terrains you think to walk and wear proper hiking boots. All that is on top of making sure that you are allowed to hike.
Your doctor will tell what kind of preparation you need to engage with to prepare for hiking, i.e., strength training, yoga, proper stretching, etc.
How To Prevent Lower Back Pain After Hiking?
Good preparation and planning are proactive ways to minimize the possibility of lower back pain. Your everyday living plays an essential role in all that. If you never exercise during the week, but you hike just on weekends, then the chances are that you will receive some back pain.
If you love hiking, it is customary to love activities in general. If you love hiking, it is normal to love activities in general. The hiking itself is a form of exercise, and the existing conditions make it more or less strenuous. Here are ideas to act proactively and have fewer chances of back pain.
Posture
Wear your backpack and your boots, along with your pants. Sit next to a full-body mirror and observe. Do you lean forward or backward? Is your backpack too heavy, making you hunch or tilting your chin forward?
Do you feel uncomfortable and pressure on your shoulders or your waist?
If any of these look like that, you need to adjust your posture and maybe fit your gear better. Your torso may need some strength exercises to get firmer, so you can stand straight and carry that weight more comfortably.
Good posture is a result of many smaller daily habits besides strength exercises. Notice how you sit on your chair while working or use your body if your job is not desk-related. Stretching is an essential part of your daily routine(s). It is not something to neglect, and if you sit for long hours -as I do- you need to do stretching exercises during your working day.
Body Mechanics
Have you seen how weight lifters practice and lift lots of weights? They handle their body far better, using their feet, hips, and abs properly. Beyond strength, a large part of their movement relies on good technique.
When they bend to lift something, they don’t hang their shoulders down nor bend their waist to a 90 degrees angle. Instead, they bend their knees and lower their body when they want to lift something from the ground to an overhead or chest-level position.
Their feet are open at the width of their shoulders (well, except for some special lifts). That provides a solid, stabilized posture. Adopt that logic when you have to take weights on or off. Your backpack is one of these weights.
Upper Body Strength
As mentioned, weight lifting is an excellent way to build that strength. Sign up for a gym, get professional guidance from an instructor, or sign up for Crossfit. With the scaling options Crossfit provides, you can build your whole-body strength.
Overall Strength
Some muscles tend to soften while others overwork if you work behind a desk all day long. Your neck and upper shoulder parts are some of these. When we use a monitor or bend our head down, these muscles get tired but don’t build on strength.
When you bend your neck while sitting for long periods gradually causes back pain.
On top of that, if you don’t exercise frequently, all that sitting takes a toll on your overall health. Some studies show that sitting for a long time shortens your life span. Your muscles weaken, and your stamina is reduced. All that -when hiking- affects how you move, and as you get tired, you start walking in the wrong way, which can lead to lower back pain.
Hiking Poles
Hiking or trekking poles are a must when carrying a heavy backpack or going uphill and downhill on rough terrains. Lots of weight is shifted to your hands supported by the poles and reduces the pressure from your lower back.
Footwear
The right size of hiking boots or shoes and their quality will affect how you walk and how much boot materials absorb the step shock. If you like, add extra innersoles for extra cushioning but make sure they fit well, as that extra height may make your foot balance improperly.
If your boots are the wrong size, it will cause pain. Pain will make you walk funny to avoid it, and that type of wrong walking will put lots of pressure on your lower back. Your knees will also suffer in hiking, and all that will cause even more discomfort and pain.
Hike Relief
What happens when the lower back pain strikes during hiking and not afterward? The best is to do the following:
- Remove your backpack or daypack.
- Stop and rest for a while. Lie down on a flat surface with your knees bent or to your side (fetus position).
- Do legs and lower back stretching.
- Massage the painful area using your hand knuckles, either standing up or lying down while pressuring them between your body and the ground.
- Don’t let your body get cold. Wear a base layer.
- Adjust your backpack before you put it on again.
If you plan to sleep outside, make sure you have a good sleeping bag and a suitable sleeping pad that cushions you against the hard ground. It would be best to rest correctly to reduce or avoid lower back pain from hiking.
If the pain is tolerable but annoying, or it doesn’t let you sleep, take a painkiller that is allowed by your doctor.
Post Hike Relief
If the lower back pain persists for more than 48-72 hours, you should visit a doctor. The same stands if you notice swelling, redness, or other symptoms and the pain is not going away.
If painkillers are not working for you, you should consult an expert. There are various other ways where you can alternate between cold and heat to see if that works for you.
Make sure you rest and sleep well.
How To Assess Your Lower Back
Here are some useful flexibility and motion tests
Part 1: Assess Lumbar Flexibility & Motion to Reduce Lower Back Pain
Low back pain usually comes with less motion range, aka less flexibility. There is plenty of research about having hamstrings tightness and lower back pain.
The whole system is both connected and all elements, including your pelvis, influence each other when you move. Pressure and stress are applied to your spine, increasing the chances of back pain.
The tests you see in this section help you to realize your flexibility and mobility levels by understanding the range of motion you can achieve is. Some of them are usually done by a trained professional or a 3rd person that assesses and understands what they see. With these tests, you will notice any limits in motion along with weakness but also your strengths (not all have to be wrong, right?).
90/90 Straight Leg Raise Test
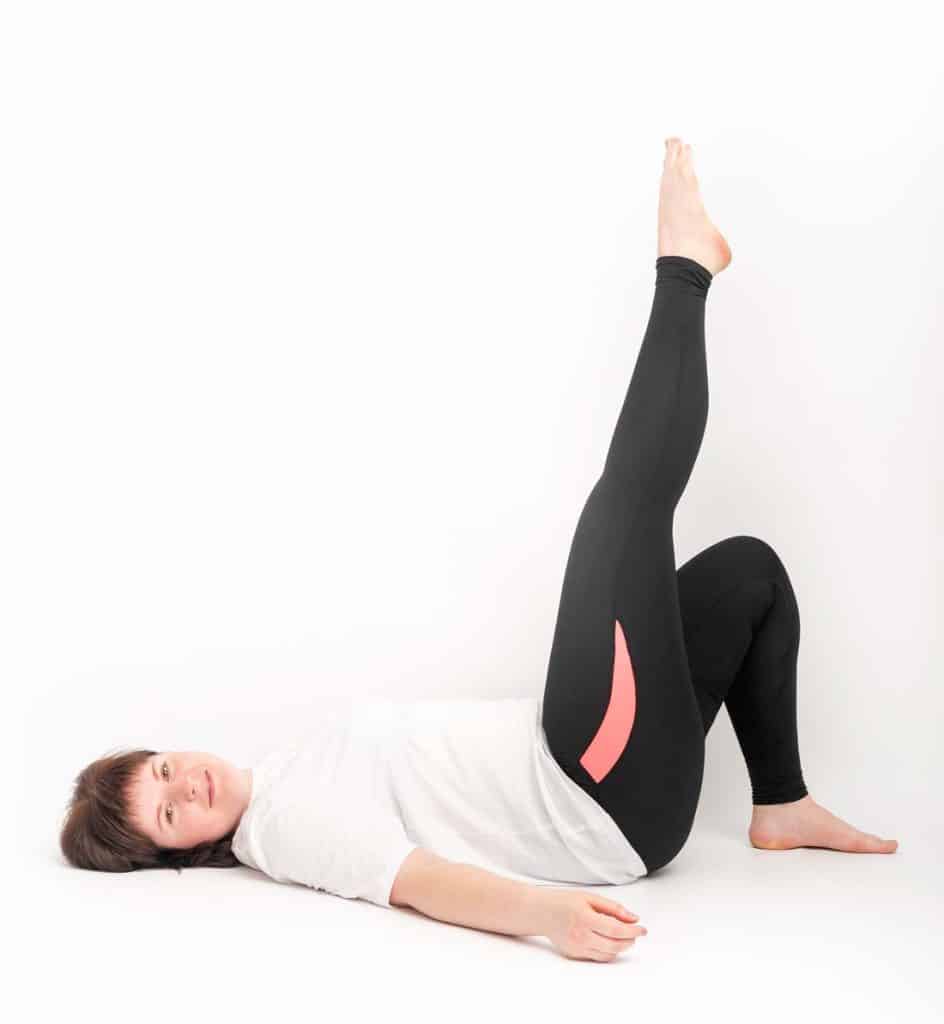
Lay on your back on a flat surface. Flex your hips and knees to 90 degrees. Maintain this position and grasp behind each thigh to stabilize your hips. Next, actively extend (straighten) one leg as much as possible. Bring the leg back to 90 degrees and repeat for the other leg. For this test, hamstring muscle tightness is indicated if either leg cannot extend the knee within 20 degrees of full knee extension. The optimal range for hamstring flexibility is 80-90 degrees flexion.
Here is the video that shows how you can perform this test.
Lumbar Spine Active Range of Motion (AROM) Assessment
Each movement is performed while you stand. You need someone to watch and observe any difference in your motion range. If any action causes you pain, avoid it. Your observer should look for any limitation in your motion as lack of balance, stiffness, and angles that cause pain or even spasms.
Flexion
This is about 40-60 degrees of movement, and the observer must watch for compensatory movements in the thoracic spine. The normal curve in your lower back should flatten. Watch for jerky or painful movements and note how far forward the person performs the flexion.
Here is a video demonstrating this type of assessment.
Extension
This is about 20-35 degrees of movement. You must place your hands on your hips to stabilize the movement and not compensate with pelvic exercises. The video is the same as in flexion.
Lateral Flexion
You run your hand down the side of the leg while attempting not to make any forward or backward movements. Compare with the other side and note the amount of rotation performed together with the flexion. The range is 15-20 degrees. The range is 15-20 degrees.
Rotation
The range is from 3-18 degrees. It can be performed standing or sitting to eliminate compensatory hip movement. See the video for both L. Flexion and Rotation.
Seated Piriformis Test
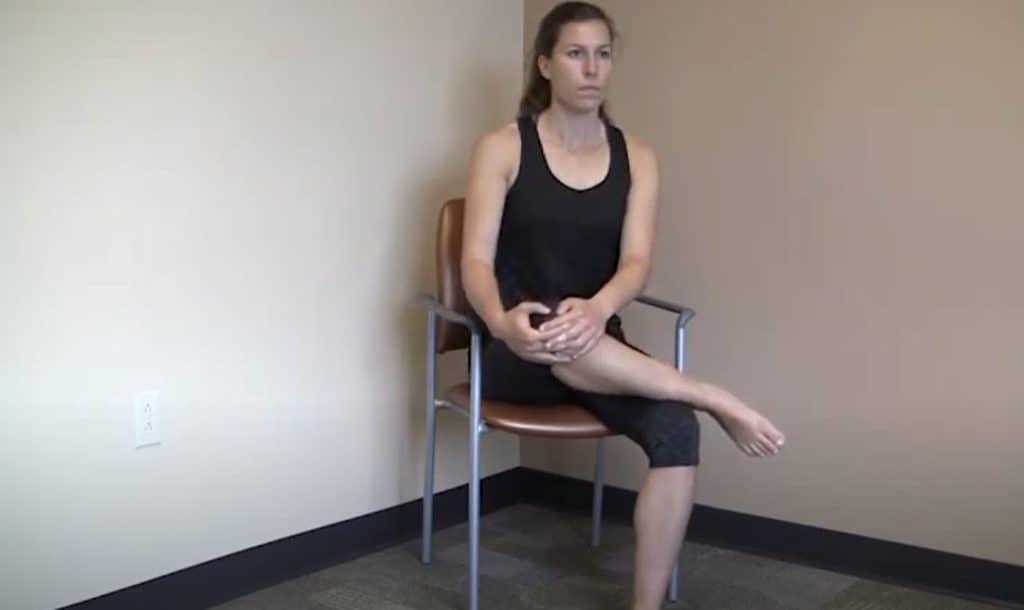
Watch the video on how to do the test.
The piriformis test is used to screen the piriformis muscle and detect tightness of the muscle or other discomforts of the sciatic nerve as it passes through or under the Piriformis muscle. You can do it, but it is best to be done by an examiner.
Begin with a seated position on a chair with the back upright and feet resting on the ground. Cross the affected leg and place the ankle of the affected leg on the unaffected knee. One hand of the examiner is at the ankle to stabilize the part, while the other hand is placed on the lateral side of the knee. You are then asked to bend forwards to feel the stretch in the gluteal region, or the examiner pulls the knee towards the chest.
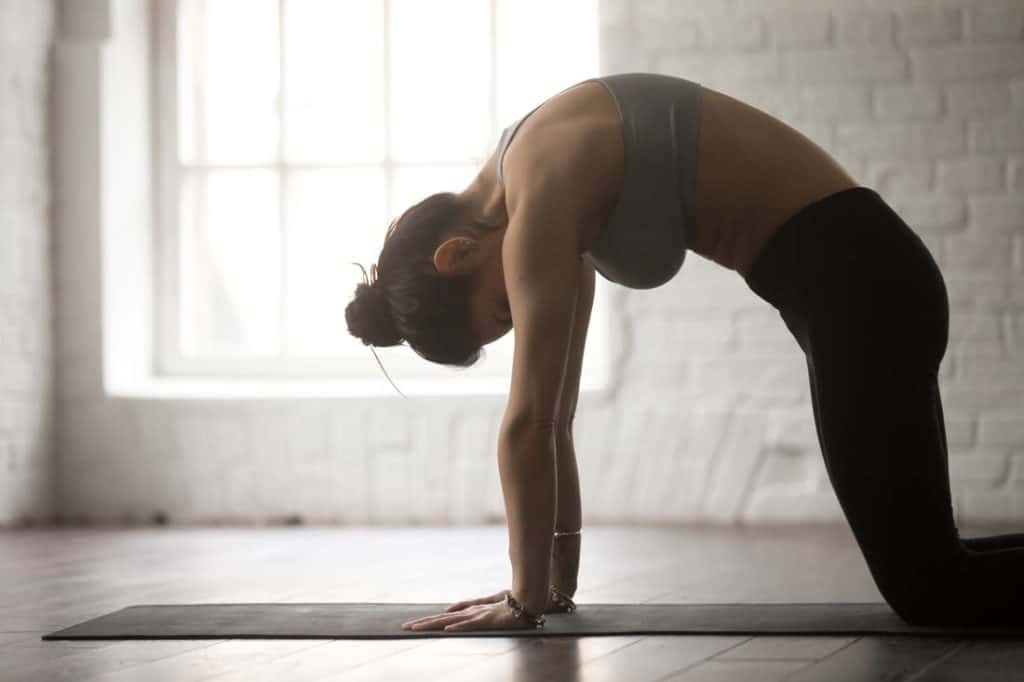
Cat-Cow Test
Kneel on an exercise mat or floor, position your knees and feet hip-width apart, pointing your toes towards your body. Slowly lean forward to place your hands on the mat, positioning them directly under your shoulders at shoulder-width with your hands facing down. Gently stiffen your core and abdominal muscles to position your spine in a neutral position, avoiding any sagging or arching.
Cat Position: Gently exhale and contract your abdominal muscles, pushing your spine upwards towards the ceiling, and hold this position for 10 – 15 seconds. Allow your head to fall towards your chest, maintaining alignment with the spine.
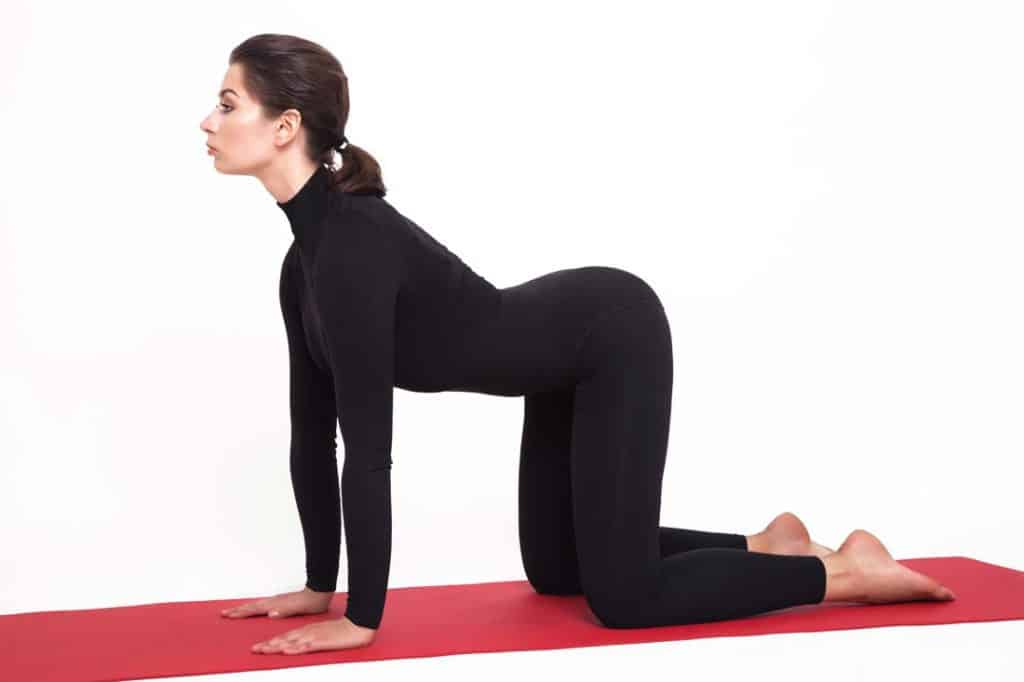
Cow Position: Slowly relax and yield to the effects of gravity. Let your stomach fall towards the floor (increasing the arch in your low back) and allow your shoulder blades to collapse together (move towards the spine). Hold this position for 10 – 15 seconds before returning to your starting position.
Part 2: Assess Lumbar Postural Control to Reduce the Risk of Lower Back Pain
Are you ready to check the level of lumbar postural control? Do these exercises and observe how well you can move your body into a correct position and what blocks you from doing it.
Can you maintain the correct position? What is the range of painless pelvic motion you can achieve? The purpose is to find your limits and not overcome them or stress your joints beyond the point you start feeling lower back pain. You don’t want to overload your lower back.
Pelvic Neutral Stabilization in Supine
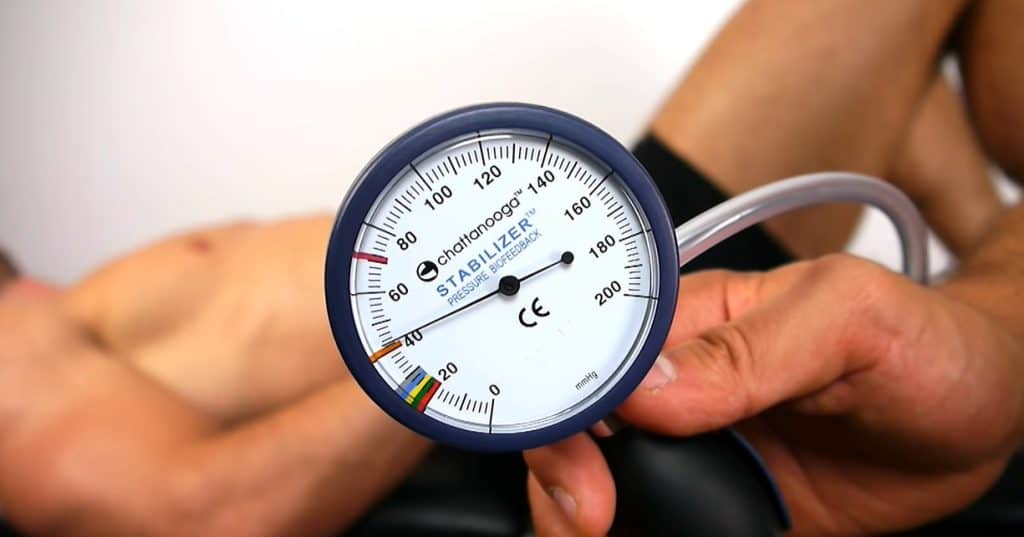
This assessment can be done using an extra biofeedback pressure cuff or not.
Lay down on a flat surface; the floor is ideal. Bent your knees at an angle where your sole area sits on the ground with toes facing forward.
Pull your belly button toward your spine while tilting your pelvis toward the ceiling. As you do that, tighten your glutes and hip muscles. Hold that position for 5 seconds. Repeat for 3-5 sets.
When you do the same exercise using a biofeedback pressure cuff you will notice much pressure your core muscles apply as you perform pelvic neutral and can serve as an excellent tool for measuring your performance.
It is best to see the complete video from here.
Single-Leg Bridge Test
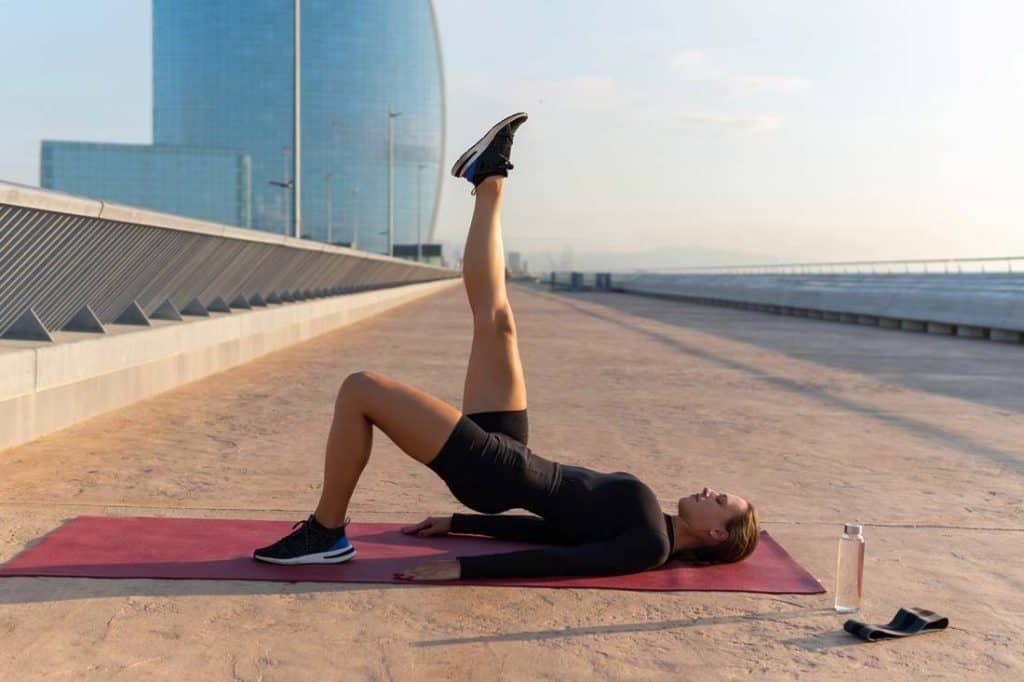
This test is a common lumbar extensor exercise that serves as one of the simplest ways to assess lumbar control. Performing a bridge from the floor will require muscle activation from your gluteals and hamstrings. It will also challenge your ability to maintain proper spinal alignment as you experience pelvic-neutral exercise.
- Start by laying on your back with your hands by your sides, knees bent, and feet flat on the floor. Make sure your feet are under your knees. Tighten your abdominal and buttock muscles.
- Raise your hips to create a straight line from your knees to shoulders.
- Squeeze your core and try to pull your belly button back toward your spine.
- Slowly raise and extend one leg while keeping your pelvis raised and level.
- Hold for 5-10 seconds.
- Return to the starting position with knees bent. Then perform the lift with the other leg.
Quadruped Movement Tests
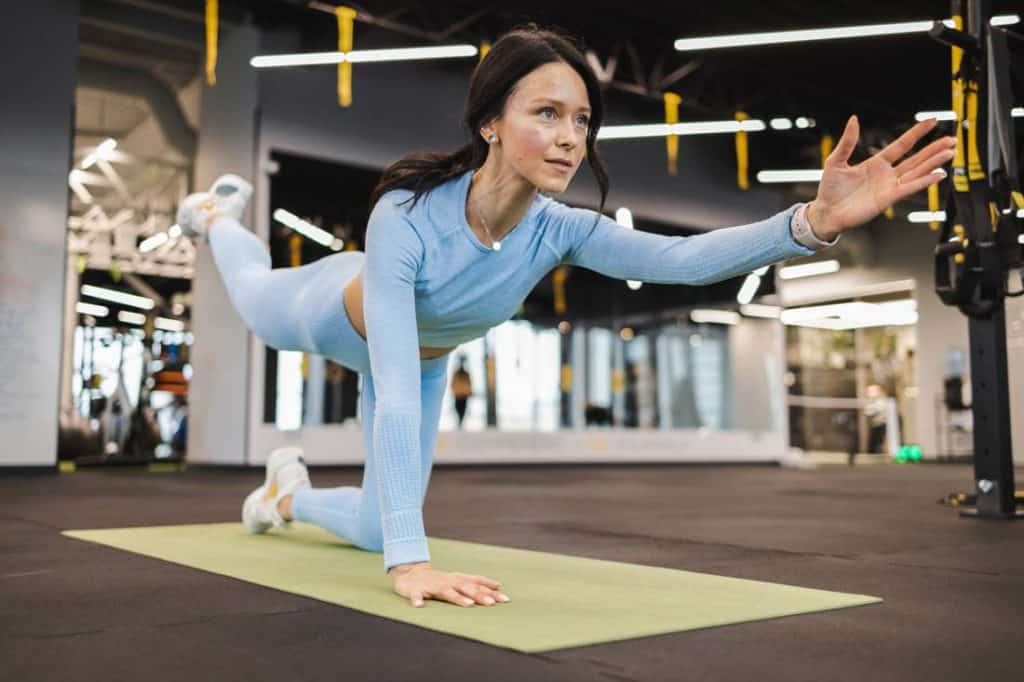
Kneel on an exercise mat or floor, position your knees and feet hip-width apart, pointing your toes towards your body. Slowly lean forward to place your hands on the mat, positioning them directly under your shoulders at shoulder-width with your fingers facing forward.
Hip Extension: Slowly extend your left hip (raise and straighten the knee), attempting to develop it until it is at, or near parallel, to the floor without any rotation in the hip. Your goal is to keep both hips parallel to the floor.
Shoulder flexion: Slowly flex your right arm (raise and straighten the arm), attempting to raise it until it is at, or near parallel, to the floor without any tilting at the shoulders. Your goal is to keep both shoulders parallel to the floor.
Tip: The use of a light bar placed across the hips, parallel to the waistline of your pants, provides visual feedback to hip rotation and what corrections are needed. You may also use a bar across the shoulders to provide visual feedback for shoulder rotation. Your head should remain aligned with the spine throughout the movement.
Part 3: Perform Core Stabilization Exercises to Avoid Lower Back Pain
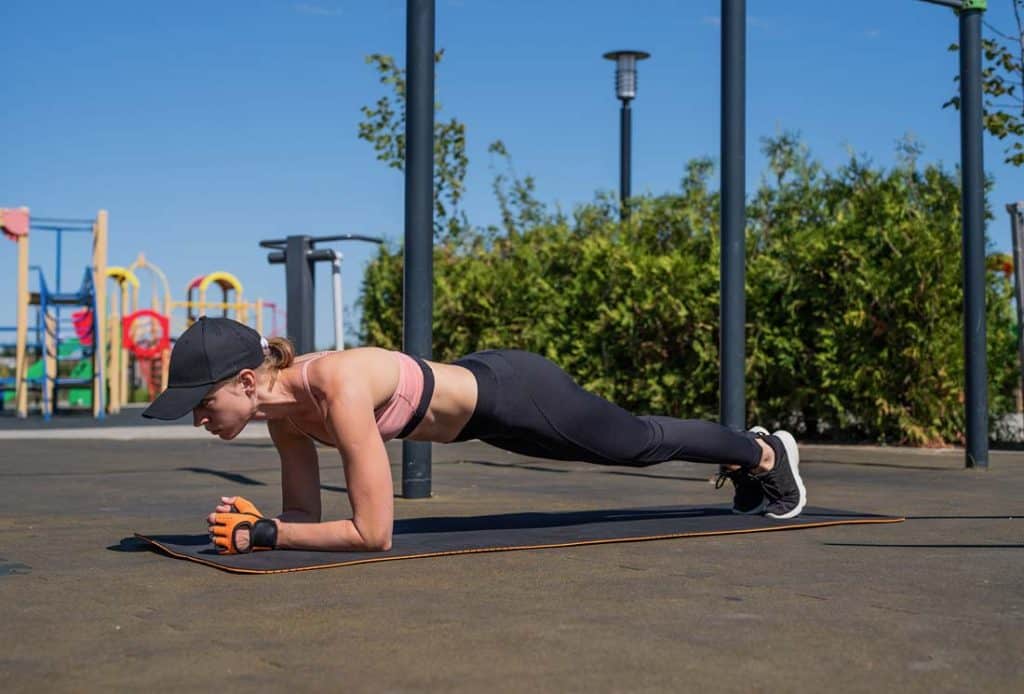
These exercises aim to make your core more robust and thus provide better stabilization.
Abdominal Bracing
Abdominal bracing happens when you contract the muscles around your spine to create a rigid midsection. In bracing, we tighten all the muscles surrounding the abdomen. As you contract the abdominal muscles, the erector spinae muscles immediately go into joint action and support the back from the rear.
Watch this video and see how it is done.
Stability Ball Exercises
Do stability balls do anything? When appropriately used, stability balls can strengthen the core (abdominal and lower back muscles). These muscles are used to perform daily activities. A strong core helps to protect the back and stabilize the whole body.
See this resource for different exercises.
Seated Pelvic Neutral Hold Exercise
This exercise helps you practice holding a neutral spine and loosen up your back muscles. Try this exercise if you’ve been experiencing lower back pain & work to improve or fix your anterior/posterior pelvic tilt.
- Sit with a neutral spine.
- Keep core tight
- Gently work on arching your back and returning to a neutral spine
- Repeat
Seated Marching Exercise
This sitting stretch exercise for the lower back will help improve your mobility, reduce low back pain, and even be done at home. All you need is a chair!
Watch how to do this.
Wall Sit Exercise
For this exercise, you only need a wall and you. It strengthens your core and your legs. Watch the video with instructions. You can also do the practice with a stability ball (watch this). That allows you to move vertically up and down.
Bridging Exercise
The bridge exercise can be done using a stability ball (watch this to do it right) or a Bosu ball (watch). Both these exercises strengthen your core, abs, and lower back muscles.
Plank Hold Exercise
Plank is an excellent exercise when -also- done right. Watch this.
Begin by lying on your stomach. Place your elbows below your shoulders, the hands with the palms on the ground, and onto your toes. This will create a straight line from the shoulders to the heels. Hold this position for approximately 10 seconds. If you can maintain this posture and hold longer, you may do so.
If you begin to lose posture by dipping down or rolling side-to-side, you have performed this for too long. The key here is to maintain a good posture for as long as possible. Take the amount of time you can hold the position and complete however many repetitions you need to add up to 60 seconds.
This may be four sets of 15 seconds, three sets of 20 seconds, or even six sets of 10 seconds. If this is too difficult for you, you can perform this exercise by placing your knees on the ground and arms in the same position and again holding for an accumulated total of 60 seconds with good posture.
Back Pain Relief Options
There are various ways to achieve after-hike recovery, and we decided to present a number of them. Some can be applied while hiking, while others need special facilities and trained specialists.
Analgesic
Ensure a first-aid kit is equipped with all the necessary medicine and items. Do include analgesic pills or/and creams that your doctor permits you can use. Special analgesic creams can be applied topically and ease the pain to allow you to reach the hiking exit point.
Sports Massage From A Trained Therapist
You can try self-massage to -possibly- relieve some of the pain. Use your knuckles to massage your sore spots or lie down against a solid surface, to receive some pressure on the area that causes pain.
However, when you return to your base, visit a trained therapist who will diagnose and massages the areas you need to comfort.
A Visit To A Medical Care Provider For Prescription Strength Pain Relief
A therapist will typically recommend if you need to be examined further, depending on the severity of your case. Spine-related specialists or other professionals trained for your issues should be consulted to identify if your problem is serious on simple muscle pain.
Hydrotherapy Involving Alternating Applications Of Cold And Hot Packs
The alternate hot and cold hydrotherapy (known as contrast bath therapy) consists of repeated immersions in water where you alternate between warm and cold water temperatures. Athletes use the contrast method frequently. Athletes use the contrast method frequently. There is research (more than one) that supports this method to lessen muscle fatigue and consequently decrease pain or swelling.
Get professional advice and do accordingly.
Rest
Many times, the issue may move away by simply resting and relaxing. After a vigorous hiking day, allocate time to rest and relax. Take a bath, and don’t stress your body more than needed. Eat well and hydrate to allow your body to take and use the necessary ingredients to heal.
Stretching
Stretching is a must before and after any type of exercise. It should not be neglected. Even 5 minutes of stretching have immense benefits to how your muscles and joints respond under stress. You can find all kinds of stretching exercises, and you don’t need to lie down to stretch. For hikers, there are routines that you can do with your gear.
Disclaimer: This article has an informational character and is not considered medical advice. Each person needs to consult a specialized doctor for any treatment direction.
Also read Why Do Hands Swell When Hiking?
